1) Setting Page Margins in MICROSOFT WORD
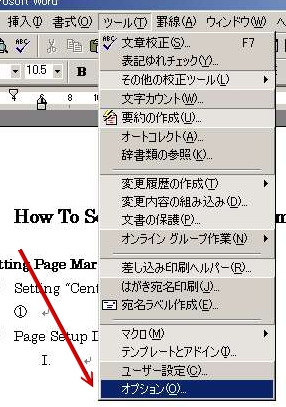
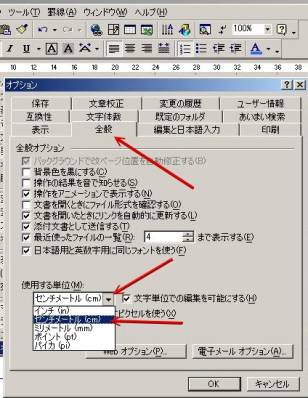
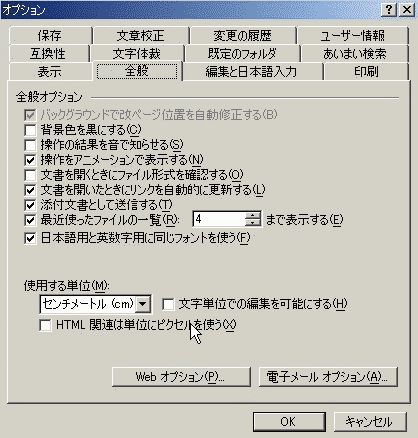
A) Check to make sure dimension units are set to Centimeters:
|
|
|
|
B) Open the Page Setup Dialog:
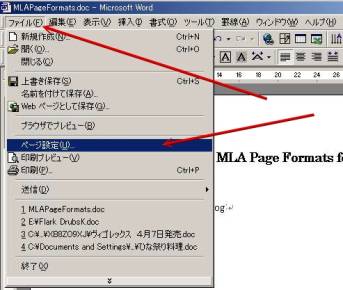 |
|
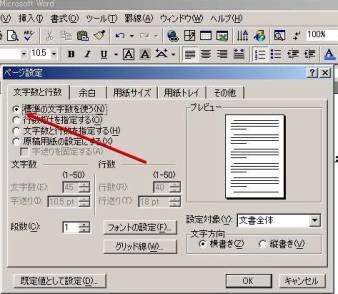
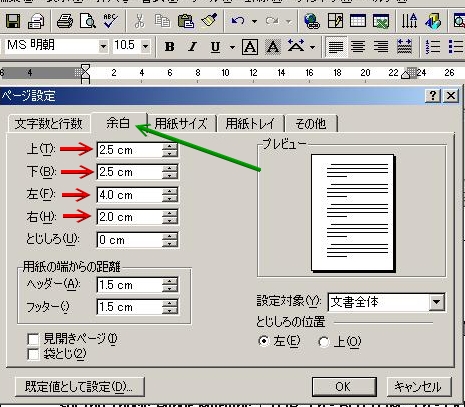
C) Set the Thesis Paper Margins: [ TOP=2.5 - BOTTOM=2.5 - LEFT=4.0 - RIGHT=2.0 ]
|
⑥ Click on OK to Exit Dialog Box |
2) Setting the typeface (font) and point size
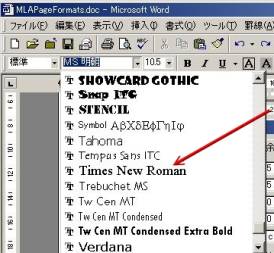
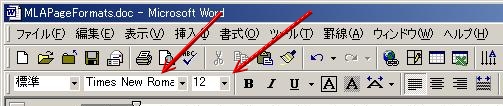
D) Select an English Serif Typeface [Times New Roman] and set the point size to 12:
|
|
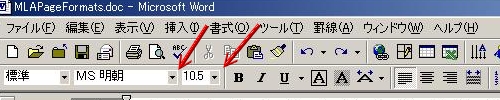
E) Set the point size. The combo boxes should read as below
|
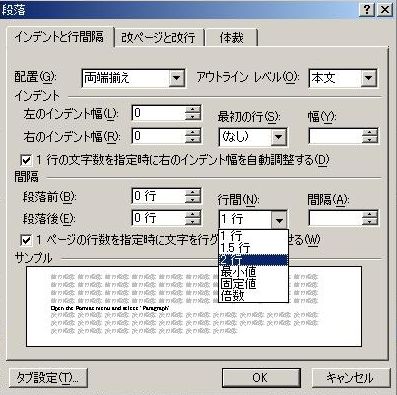
3) Set the line spacing to Double Space
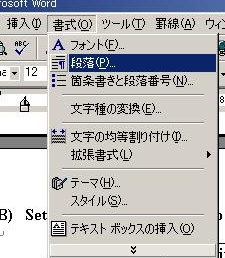
F) Open the Format menu and Select "Paragraph"
|
|
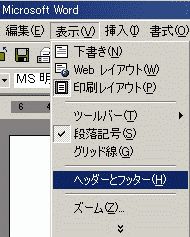
- Create a HEADER and Page Number:
- Open the "Header" dialog box:
- The Header dialog should open as below:
- You may need to adjust the height of your header by changing the size using the vertical ruler to the left of the page. Your page number should appear 1.25cm from the top of the page, and the first line of body text should appear 2.5cm from the top of the page. To learn more about Header functions, please consult the "Help" section, available in MS Word.
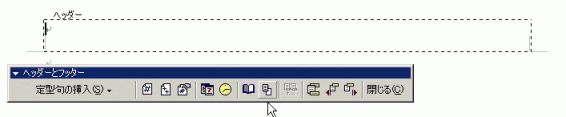
- Inside the Header, at the left margin: In the Header dialog, click on "page number" (the # icon):

- Place the cursor just to the left of the page number (left-click the mouse there):

- Click the "Right Justify" icon on the main toolbar to move your header information to the right margin:

- Inside the Header, at the left margin: In the Header dialog, click on "page number" (the # icon):
- CLOSE the Header dialog box:

- After you set the header height, and any time you change the header size, please double-check your page margin settings, as shown above.
You can now write a left-justified heading (such as "Introduction").
Next, the format of a normal body-text paragraph is described:
- Open the "Header" dialog box:
- SETTING UP STANDARD PARAGRAPHS
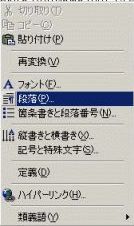
- Open the PARAGRAPH dialog:
MOUSE > Right-click > Select "Paragraph"
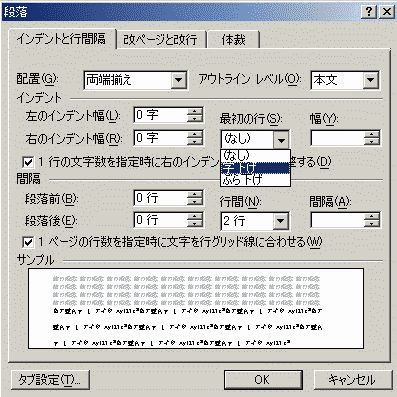
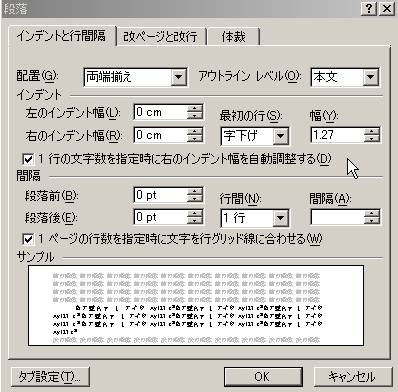
- Set the "First Line Indent" to 1.27cm, as shown in the two illustrations below:
- CLOSE the dialog box: click "OK"
- Open the PARAGRAPH dialog:
- TURN ON AUTOMATIC HYPHENATION
- Select: TOOLS > "Additional Tools" > "Hyphenation"
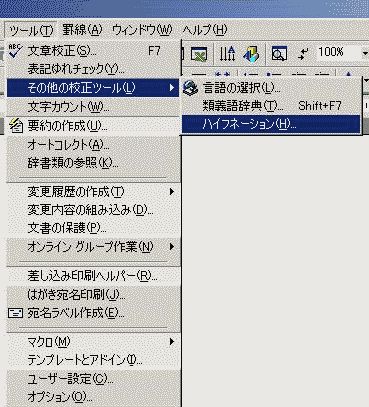
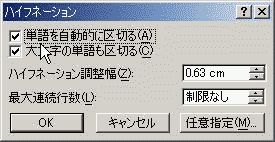
- Check the "Automatically Hyphenate" checkbox, and then close the dialog:
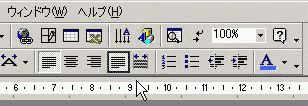
- SET "FULL JUSTIFICATION":
- Click the "Full Justification" icon on the main toolbar, and type your first paragraph.
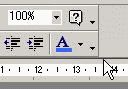
- If you are missing the "Full Justification" icon on your toolbar, you will need to add this feature to the toolbar.
- Click the arrow on the far-right side of the main toolbar
- This menu bar should appear:
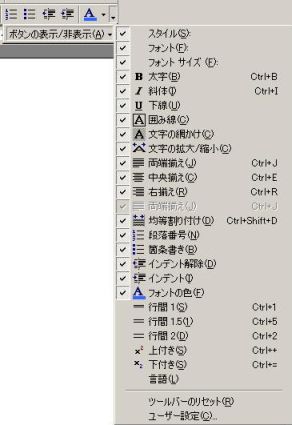
- Select the "User Customize" item at the bottom of the menu bar:
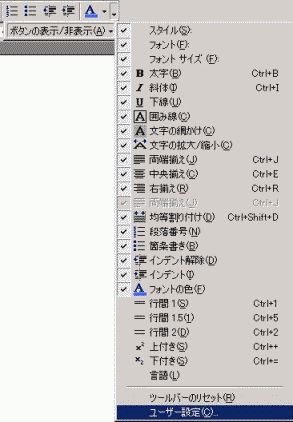
- SELECT: Add/Remove buttons > Customize. A dialog should appear. Select the "Command" TAB:
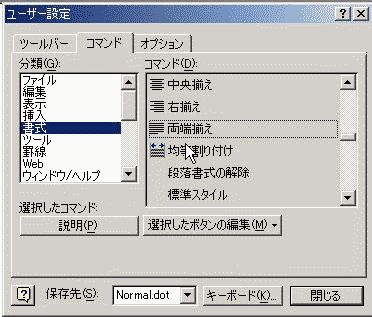
- After you locate the icon and description, left-click on the icon in the dialog box and drag it with the mouse to the toolbar, to the exact place where you want it, and release the mouse. This completes the process.
.
- Click the "Full Justification" icon on the main toolbar, and type your first paragraph.
8. SAVE YOUR DOCUMENTG) Save Smart: Choose a short filename for your thesis draft, and then number each successive draft. This way, if you make a mistake or lose data, you can return to the previous draft. It may help as well to use your last name. Use the "SAVE AS" command (in the File menu) to save a draft you are working on, under a new name. Here are three examples of filename styles:
a) kurosawa1.doc (name and version #)
b) kurosawa2.doc
c) kurosawa3.doc (etc.)
a) KurosawaThesis1.doc (name, description and version #)
b) KurosawaThesis2.doc
c) KurosawaThesis3.doc (etc.)
a) Kurosawa-4-10.doc (name and date)
b) Kurosawa-4-22.doc
c) Kurosawa-5-6.doc (etc.)
If you have any further questions, please ask Profs. Ohno or Gilbert.
SAMPLE PAPERS in strict MLA style can can be found here (in .PDF Acrobat form):
http://www.dianahacker.com/resdoc/humanities/sample.html
http://www.bedfordstmartins.com/hacker/papers.htm
NOTES:
Templates and Sample Papers:
http://owl.english.purdue.edu/handouts/research/r_mla.html#additional
How to set up Standard MLA Formats in Microsoft Word:
http://owl.english.purdue.edu/handouts/research/r_mla.html#General
Also see: this site
Return to the MLA GUIDE
- SET "FULL JUSTIFICATION":
- Select: TOOLS > "Additional Tools" > "Hyphenation"